Sunday, June 26, 2011

Made for Charlotte: Cuddle Sack

I love handmade.  I love creating with my own hands, I love giving handmade, and I love receiving handmade.  And when all this creating, giving, and getting involves babies, it's even better.  Fortunately I have friends and family who either share my passion for all things handmade or are willing to indulge me since they know I like it.

So for the next little while I'll be blogging the amazing gifts people made for Charlotte.  There's a little of everything, from cardigans to blankets to hair bows.  The handmade lovelies also represent a host of skill levels, from grandmas who've spent years honing their crochet skills to the elementary-age girls next door who sewed their first sock monster softies.  Melt my heart.

Let the parade begin!

It seems fitting to kick things off with a gift set made by my own mother. 

My mom crocheted this cuddle sack and bonnet for Charlotte.  I've also heard cuddle sacks called cuddle cocoons or swaddle sacks.  When you put Charlotte inside, the cuddle sack is a great way to keep her swaddled.  The yarn has a little give, but not so much that Charlotte's arms flail.

I took these photos when Charlotte was a week old.  My mom has what Ben and I call Baby Magic.  She has a way of reading a child, calming her, getting her to sleep (or at least be contentedly quiet so I can sleep.)

When my mom left, I cried.  How am I ever going to handle a household, two active boys, AND a newborn without her?  True to my mom's belief in me, we're managing.  But I still can't wait for her to come back.  I miss my momma.

Monday, June 20, 2011

Charlotte's Nursery

This is my happy place.  It's clean and uncluttered.  It's feminine.  It's calm.  My husband and I put hours upon hours of love, sweat, and probably a few tears into preparing this haven for our daughter.  Now with the arrival of our sweet Charlotte Rose, the nursery is complete.

Allow me to show you around...

As I mentioned here, Charlotte's room is a knock-off of the Scallop Pique Nursery from Pottery Barn Kids.  You can read the DIY info for the wall stencil HERE.  The photo above shows the view from the doorway looking right.  The photo below pans around.  I think you'll see how the photos connect to show the layout of the room.

Framing the window is a pair of lavender Audrey Chenille Dot Panels from Pottery Barn Kids.  The bookshelf and lamp are from Target.  I've since added scalloped basket liners to the white wicker baskets, another feminine touch to continue the scallop theme in the room.

The ever-necessary diapering area and rocking chair.  Seriously, how many times am I here each day?  A dozen?  Seems like it, at least.

The baskets on the dresser are both from Pottery Barn Kids, though I couldn't find either on the PBK website.  I bought them in the store.

Isn't that doll adorable?  My boys like to hold it by the feet and swing it at each other, caveman club style.

I had new white cushions made for my rocking chair.  The old cushions were ivory, so not a match for Miss Charlotte's lavender and white nursery.  Before you gasp about white upholstery in a child's room, be assured that the covers are removable and I chose washable fabric (that I bought on sale for $10 per yard - score!).

Going back to the opposite wall, here is a closer look at the wall art.  Click HERE for more details about how I made each piece.

Click HERE for more details about how I made the crib bedding.

Still love the scalloped eyelet trim on the crib skirt.

For the finishing touch, we hung a crystal mini-chandelier.  As my six-year-old neighbor said, it looks like it was made for a princess.  My thought exactly.

Sunday, June 19, 2011

Happy Father's Day

 Happy Father's Day!

You heard that loud and clear, right Dad?

Monday, May 30, 2011

Introducing Charlotte Rose

Charlotte Rose is here!
8 lbs. 10 oz.
20 3/4"

My sweet baby arrived and has a name: Charlotte.  This labor lasted longer than both of my previous labors combined.  But in the end I still got my healthy, beautiful daughter.  I'm absolutely smitten.

My mom is here cooking and cleaning, spoiling us rotten, and getting in as much snuggle time as I'll let her.  (I can't get enough of my baby, either, so I'm trying to share.)  My mom also showered us with handmade gifts for our sweet baby.  She made the afghan and hair band Charlotte's wearing in the photo - aren't they adorable! - plus plenty more crochet gifts that I'll get to show off later.

This little girl already has my husband wrapped around her little (and I mean little) finger.  I think he's having more fun putting her in all of her girly hair bands and such than I am.

For now I'm going to enjoy my baby and my family.

'Til later, Rachel

Tuesday, May 17, 2011

Baby Girl's Nursery: Crib Bedding

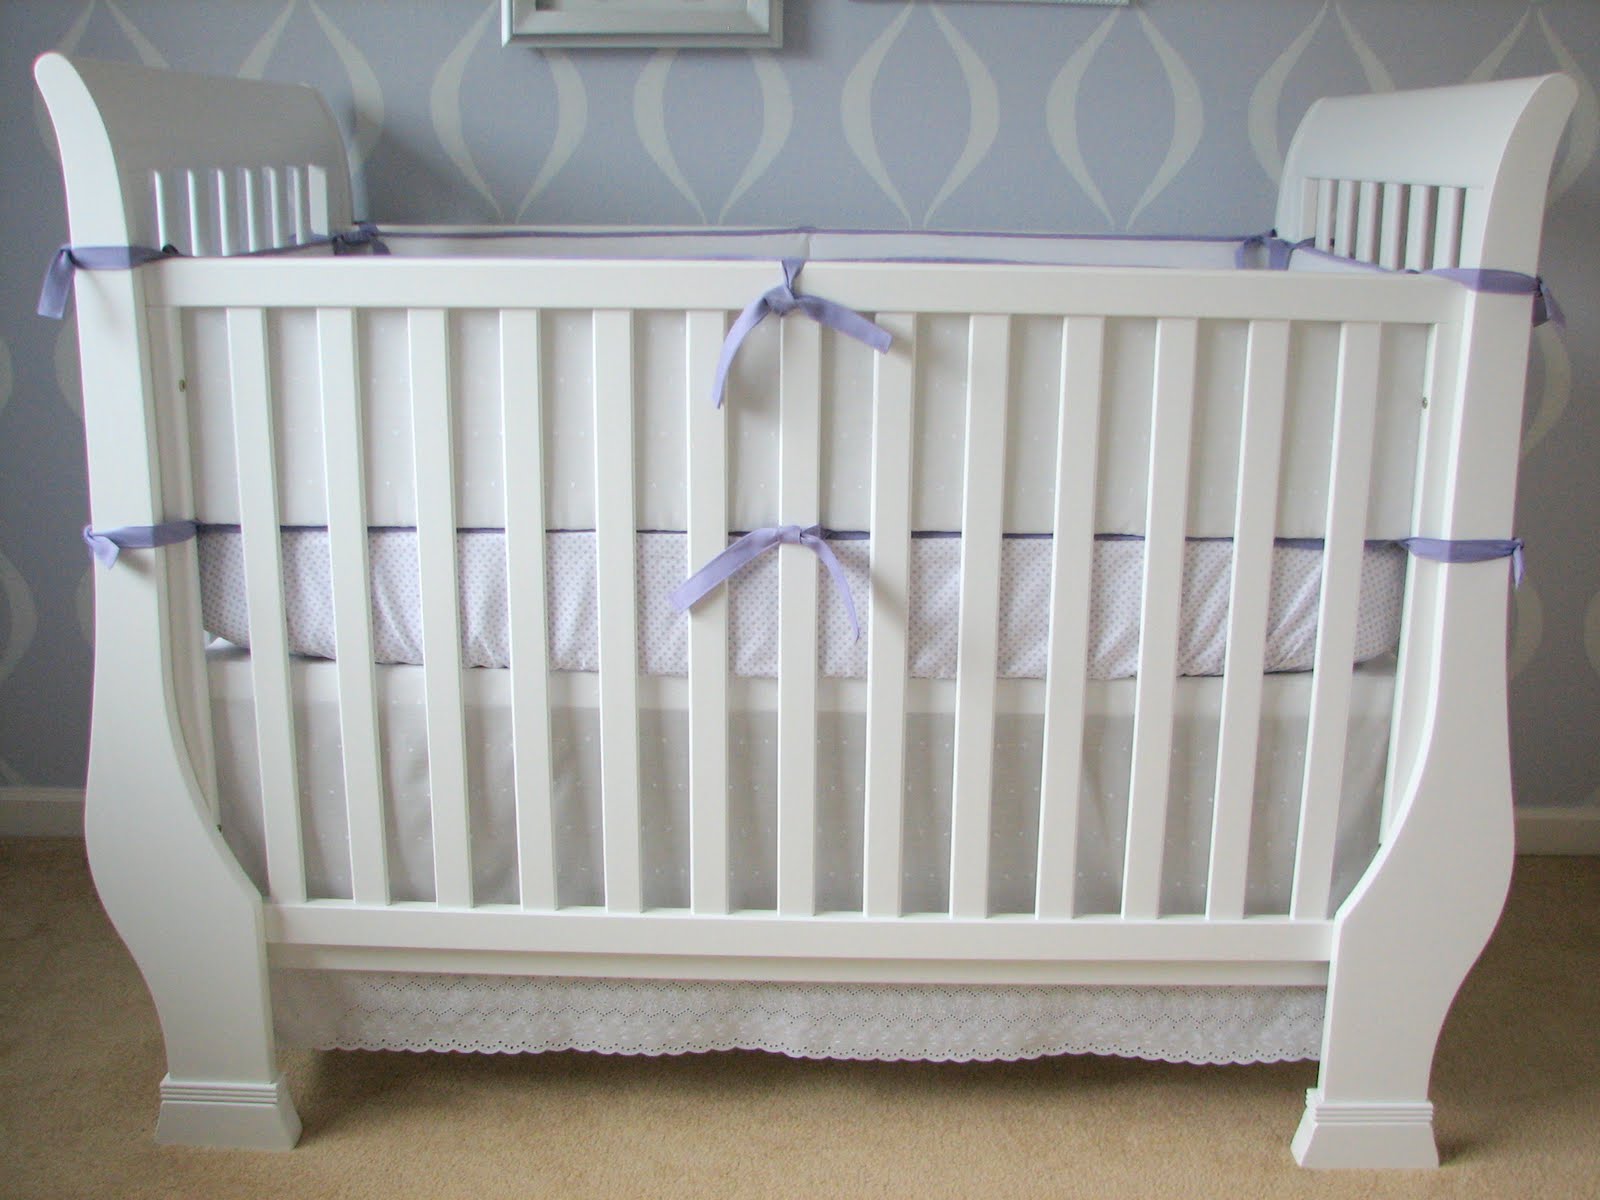
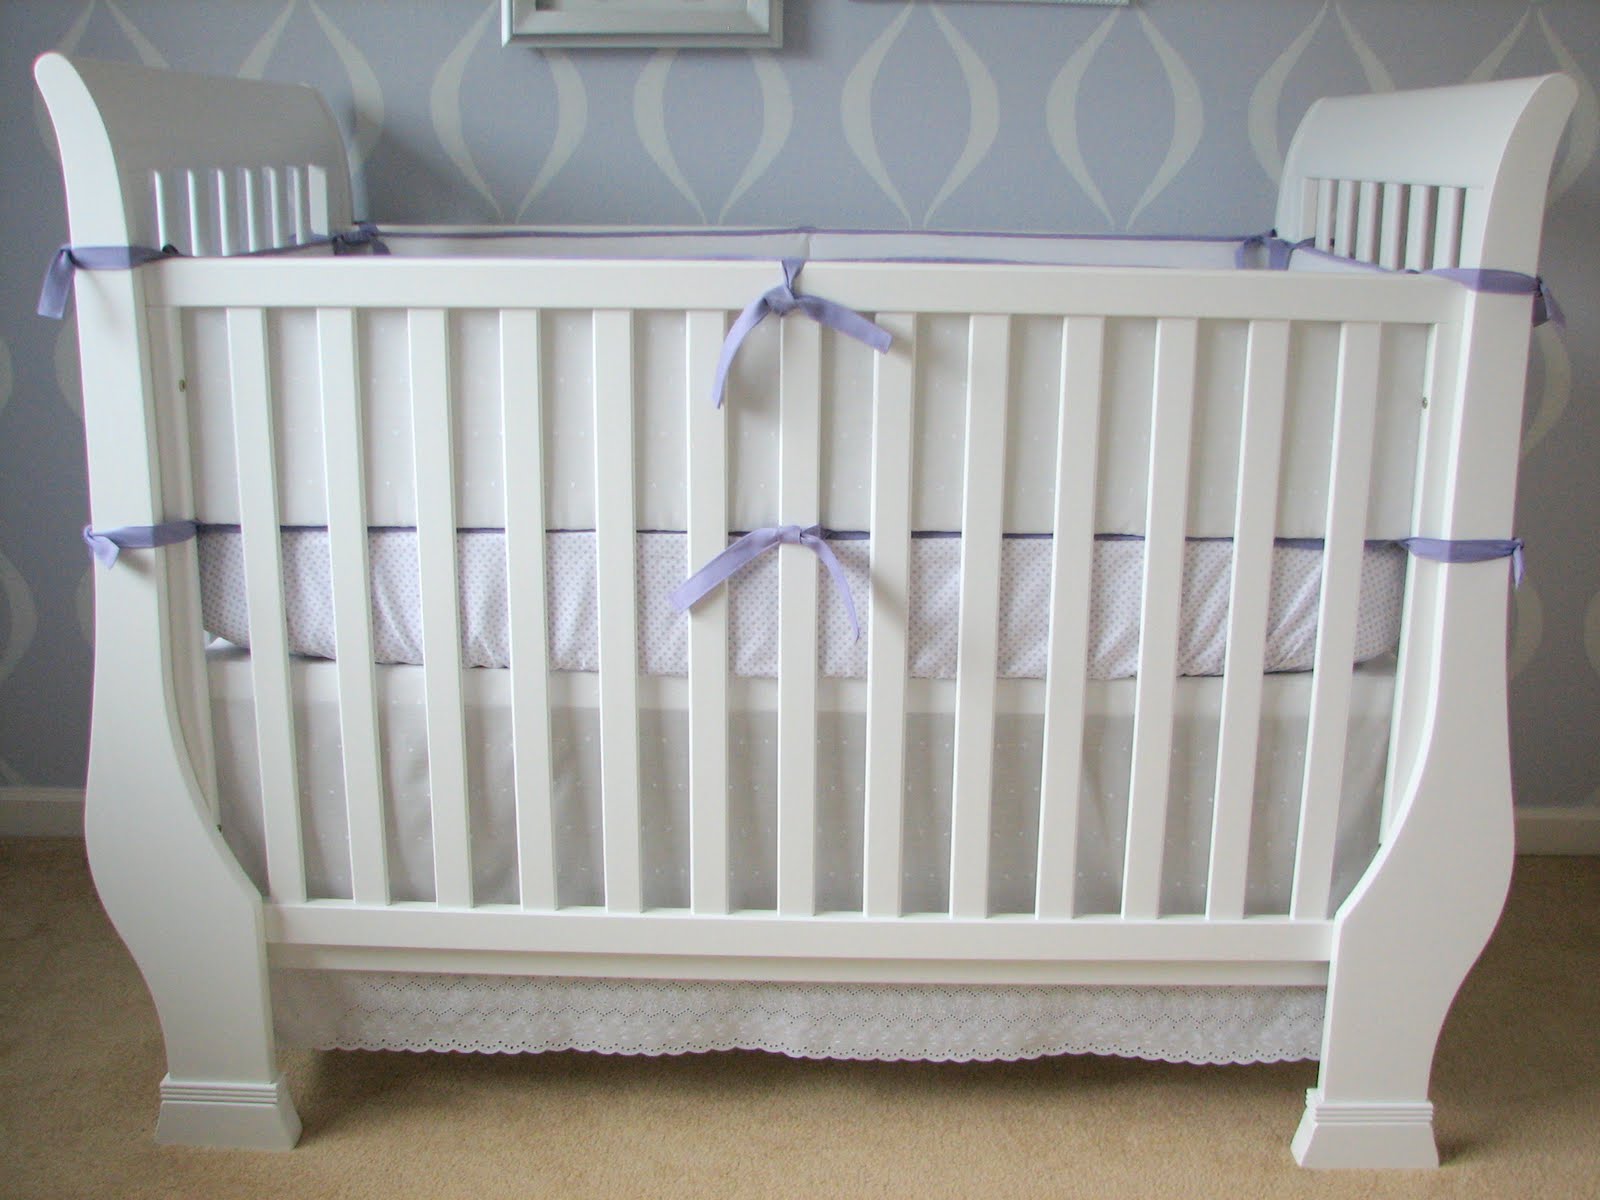
There's something calming about white.  Combine white with feminine details like scalloped eyelet trim and this crib set becomes a restful haven for my little girl.

I made all three pieces of the crib set: bumper, skirt, and sheet.  The crib sheet was so easy!  I can't believe I never knew about this.  I actually made two sheets - the one pictured is made with quilter's cotton.  I made a lavender flannel sheet as well.  Here's getting the word out, moms - if you're having a baby, pick your fabric and I'll gladly make a set of crib sheets as your baby gift.  Not only can you pick the most snugly soft fabric - or go with whatever style floats your boat - these sheets fit much better than the store bought sheets you have to muscle over the mattress corners.  If you're the DIY sewing type, I took the best from these two sets of instructions: HERE and HERE.  I used the measurements and French seam instructions from the Michael Miller tutorial, plus the all-around elastic idea from Dana's Made tutorial.

The crib skirt is made from white cotton eyelet.  Not only does the sweet scalloped edge mimic the scalloped pattern stenciled on the nursery walls, a prefinished edge means no trimming or hemming.  Beautiful AND easy.

The eyelet fabric was 45" wide (on the bolt).  One edge is scalloped.  The rest of the fabric is embroidered with tiny polka dots.  Since I only needed about 18" from the scalloped edge for the skirt, I had enough of the polka dot fabric left over to cover the outside of the bumper.

I made the ties using packaged quilt binding.  (It's essentially EXTRA, extra wide double fold bias tape.)  I cut the length I wanted (about 22"), turned under the short ends, stitched along all four sides, then sewed the finished tie to the bumper.

I made the bumper using these foam inserts from JoAnn.  I've read good reviews about them all over blogland.  So far so good from me, too.

The photo above shows not only the ties, but the piping I made and attached along the top of the bumper pads.  To make the piping, I covered cotton piping cord with prepackaged extra wide double fold bias tape, using the same brand and color that I used for the ties.

There you have it.  Crisp and clean with just the right pop of color to coordinate with the lavender walls.  Hopefully my little girl will love sleeping in it as much as I love looking at it.  :)

Wednesday, May 11, 2011

Baby Girl's Nursery: Wall Art

Last night Ben and I finished hanging the wall art in Baby Girl's nursery.  This was the last big thing I wanted to accomplish before her arrival.

I promise I'll post pics of the crib set and rest of the room soon.  :)  Consider this a sneak peek.

Also notice the stenciled scallops on the wall.  Yes, my husband is amazing.  He stenciled 250 scallops, give or take a few.  Once he hit his stride he could paint 10 per hour.  Yes, 10 per hour was the fast version.  So yes, he spent forever paining.  And yes, I love it!

The most meaningful piece of art is this trio of necklaces.  From left to right, you'll see my first string of pearls.  It was a gift from a dear family friend.  He is Chinese by birth, but developed a close friendship with my maternal grandparents, who sponsored him and his family to help them immigrate to the United States. We now consider Daniel and his family part of our own extended family.

Hanging on the middle necklace is a diamond pendant from my paternal grandmother.  I don't remember a time when Nan wasn't battling one of life's demons.  Her last years were spent fighting breast cancer, then lung cancer.  As a child from a poor family, she never thought she'd own anything as valuable as a diamond.  I'm especially flattered that she gave such a treasured heirloom to me.

The silver locket on the right belonged to my maternal grandmother.  She passed away last summer after 91 years of life.  There's so much to say. For the sake of posting this sometime this decade, I'm going to move along.

Next is this shadowbox.  I painted the frame silver, then covered a piece of white scrapbook paper with Prima flowers.  The flowers came dusted with iridescent glitter, which adds such beautiful dimension and subtle sparkle.

Buttons, pearls, and knockoff diamonds - what's a girl not to love?  All three pictures in this post show the background paper as a much brighter green than it really is.  Hmmm...maybe it's just not a good lighting day?  Very few are here in the rainy Pacific NW.  Anyway, I arranged dozens of white buttons, pearl brads, and tiny white flowers with rhinestone centers into a heart shape.  Attaching everything took less than an hour.  Not bad and totally worth it, eh?  The frame was a clearance find that I spray painted silver.

Finally, we have this pair of sparkly, beaded butterflies.  You'll have to click on the picture for a close up.  The butterflies are ready-made scrapbook embellishments - gotta love easy!  Yet it still adds just the right touch.

Stay tuned for the crib set!

Take care,  Rachel

Wednesday, May 4, 2011

Super Teacher

Making gifts for men can be so tricky, can't it?  Brighton has a male teacher this year.  I never know what to give as teacher appreciation gifts, Christmas gifts, and such for men.  Food?

Fortunately Brighton's teacher is a big super hero fan.  Or at least that's I assume from the dozen superhero action figures dangling above his desk.  So for a superhero-lovin' teacher, we have the Super Teacher Shirt.  The teacher's last initial is B, hence the Super B.  I'm sure I'll aso be making a Super B shirt for Brighton...and maybe even Ben.

To make the Super B symbol, I first adhered the yellow knit fabric to the t-shirt using Wonder Under.  I added the red fabric on top, also with Wonder Under, then zig zag stitched around the edges.

I also made a Super B card to coordinate with the t-shirt.  I found a diamond shape in my Silhouette library, then welded a capital B to make the symbol.  Paper from Stampin' Up! (Real Red, Pacific Point, Yoyo Yellow).

Thanks for stopping by!