Friday, June 25, 2010

GIVEAWAY: BasicGrey Stamps

Conversation with my husband last September when I started my blog.

Ben: Are you going to have one of those craft blogs where they do a bunch of giveaways?
Me: (laughs) No. Those are for big sites. Scrapbook companies send them products to giveaway. It's a form of advertising.
Ben: But you have enough stuff to giveaway.
Me: Very funny. ... Maybe I'll have a giveaway for my 100th post.
Ben: What about when you have 100 readers?
Me: Yeah right. ... Fine. When...IF...100 people ever read my blog, I'll host a giveaway.

Fast forward to this week.

Well hello there, readers! Glad you liked my tutorials. :)


And look where you come from! Turns out, it's not just my proud parents clicking around on here.


I'm such a dorky fan girl that a few months ago I started keeping a list of the countries my blog visitors come from. Though we live far, far apart, I love seeing how the internet can bring people with common interests so close together. As an added bonus, my knowledge of eastern European geography has improved tremendously since I started checking my site stats each week. :)

Now for the giveaway...I have three sets of acrylic stamps from BasicGrey.


I'd Pick You


Tweet


Inspiration


I also have a pack of BasicGrey Cozy Posies to give away. (That's a fancy name for chenille flowers.)

To enter, simply leave a comment telling me how you found my site. If you're a regular reader, I'd love to know that, too! Please make sure I have a way to contact you if you win. (Either leave your email address, blog address, or make sure your Google ID links to your contact info.) I'll pick a winner on July 1st and will gladly ship anywhere in the world. If you're willing to visit, I'm willing to say thanks!

Good luck!
Rachel

Thursday, June 24, 2010

When Kids Craft

I love that my boys are well versed in arts and crafts, but some days I wonder if things have gone too far. Like the day when...


Brighton fed his entrepreneurial spirit by cutting apart my scrap fabric, tying fat quarter bundles, and labeling them for sale. As Brighton reasoned, Why sell lemonade for a quarter when you can sell fabric for a dollar?


Or when I woke up to find my boys had climbed the fridge, brought down the paints (which are stored on TOP of the refrigerator to prevent such wild hairs), made a paint-and-marshmallow collage, took my heat tool out of my craft room, and were feverishly drying their projects to surprise me before I woke up.


Or when they cut apart their socks (which still fit and had mates) to make hand puppet ghosts.


Or when Brighton repurposed my button jar for his fruit salad. Attach a spoon and it's perfect for a backyard picnic.

As my mother says, we pay for our blessings.

Tuesday, June 22, 2010

One Paper - Three Cards


My sister-in-law recently welcomed her first child - a baby girl - and asked me to make a card for her to give as a thank you note. It doesn't take much arm twisting for me to get crafty for my nieces or nephews - especially not for a baby girl. :)

As soon as I saw this paper, I knew I'd found it. The it that makes a perfect card. A card covered in irresistibly touchable damask goodness. Yes, it's flocked. The paper is baby pink and baby soft and makes for a simple yet elegant card.


These three cards share the same supplies: one sheet of damask paper, one sheet of pink cardstock, one sheet of ivory cardstock, and pink ribbon.

When I find a paper I love, I want to use every little scrap of it. Here you can see three ways to use one sheet of paper. Pick your card based on whatever scrap you have available.

Thanks for stopping by!

Supplies
Paper: (Lush Pink Damask Paper) My Mind's Eye, (Very Vanilla) Stampin' Up!, pink cardstock. Punches: (Scalloped Border Punch, corner rounder) Stampin' Up!.
Other: pink ribbon.

Monday, June 21, 2010

TUTORIAL: Silhouettes


I love this. I absolutely love this. Of all the crafts I've made for my children, this is my favorite. Silhouettes are simple, affordable, and timelessly classy.

1. Take a profile photo of your child in front of a sunny window.

This provides a nice contrast of light and dark and helps define which line you'll follow as you cut.

2. If you're making more than one silhouette, use photo editing software to make busts the same size.

Since my photo editing software is pretty bare bones, the easiest way for me to do this was to open my photos side by side, set them to be cropped to the same size (5x7), and zoom in and out until the heads looked approximately the same size.

3. Print photo onto regular computer paper.


4. Using double-sided tape, adhere photo to black cardstock. (see notes below)

Adhere double-sided tape the the back of the photo. Use tape only on the outer edges of the paper. Do NOT use tape on the silhouette area.


Adhere photo to black cardstock.

5. Use an X-Acto knife to cut silhouette.

You're cutting through two layers at the same time - the computer paper with the photo printed on it and the cardstock.


TIP: Add eyelashes for definition. Even if eyelashes are not visible in your photo, your silhouette will look better if your subject has eyelashes to define his or her eyes.


TIP: Pay special attention to hair details in three places: the crown of the head, the forehead (bangs), and the nape of the neck.


My son had some wild hairs sticking out from the back of his head. I did a little artistic editing to smooth them out.


(I hope this doesn't destroy the big reveal at the end of the post, but it's easier to see details on the finished project than in the pictures above.)

6. Remove computer paper and clean up edges, if necessary.

After you've cut your silhouette, remove the computer paper. Use your X-Acto knife or a pair of precision tip scissors to clean up any edges.

7. If you're making multiple silhouettes, trim them to the same height.

Place silhouettes side-by-side on your cutting mat. Here the silhouette on the left is slightly taller than the silhouette on the right.


Use your X-Acto knife and a straight edge to trim height off the bottom of the bust (chest/shoulders).


Voila! Beautiful, aren't they?

If you make one, please leave a link in the comments! I'd love to see your good work. :)

Saturday, June 19, 2010

You Used What?


What makes a card masculine? Ribbon? No. Plaid or argyle? Maybe. Duct tape? YES. Dear Granddad, please enjoy your Father's Day card made with blue painter's tape and three colors of duct tape. This is my oh-so-close knock-off of the clever Stuck with You card by Jessice Witty, featured in the May/June issue of Paper Crafts magazine.


To find the focal point for this card, I only needed to step outside my back door. This was my end-of-year card for Brighton's kindergarten teacher. She opened Brighton's eyes to the world print, the foundation of lifelong learning. I am forever grateful to her.

The sticks make sense once you read the sentiment. I love the wisdom in children's books. Life's lessons can be profound and uncomplicated.


I've kept the same Winnie the Pooh mug on my desk since my college days, holding pens and pencils within easy read. It reads, "Some days are more tumbly than others." And that's just the way life is. Here are some other little gems from the beloved author A.A. Milne. Ignore the spoon in the picture. I don't have my camera on hand so I borrowed this pic from the internet.

"If you live to be a hundred, I want to live to be a hundred minus one day so I never have to live without you."

"Sometimes," said Pooh, "the smallest things take up the most room in your heart."

"How lucky I am to have something that makes saying goodbye so hard."

"Some people care too much. I think it's called love."

"If ever there is tomorrow when we're not together...there is something you must always remember. You are braver than you believe, stronger than you seem, and smarter than you think."

"Weeds are flowers too, once you get to know them."

"One of the advantages of being disorganized is that one is always having surprising discoveries."

"Don't underestimate the value of Doing Nothing, of just going along, listening to all the things you can't hear, and not bothering."

"It's snowing still," said Eeyore gloomily.
"So it is"
"And freezing"
"Is it?"
"Yes," said Eeyore. "However," he said, brightening up a little, "we haven't had an earthquake lately."

Supplies: An A Is Just Three Sticks Card
Paper:
Nutmeg mini deck by Cosmo Cricket.
Computer Font: Pooh.
Other: Scalloped border punch, twine, linen thread.

Friday, June 18, 2010

TUTORIAL: Bring Your Child's Drawing to Life - Part 2

Welcome to Part 2 of my tutorial on how to make a softie based on your child's drawing. If you missed Part 1, you can see it here.


First, let's review. You should now have all the pieces you need to make the body of your softie - front and back.

5. Sew on arms, legs, antennae, or other appendages to make each half of your softie.

Here I'm attaching my monster's arms to make the front half of the softie. Pin the edge of your monster's arms even with the edge of its body. Notice that right sides of fabric are touching each other.


Sew on arms. (Yes, I sew over my pins sometimes. Just sew slowly and you won't break your needle.)


Repeat, sewing arms, legs, or other appendages to the back half of your softy. Now you should have your main body pieces - front and back.

6. Embellish the front of your softie.

Notice I did NOT say sew the front and back halves together. No, no. You will decorate your softie first - adding eyes, mouths, spots, scales, scars - whatever your child dreamed up.

Since the features on your child's softie will undoubtedly be different than the features on mine, I won't bog you down with too many details that don't apply to your project. Still, here are a few tips that may help you as you work.

Eyes

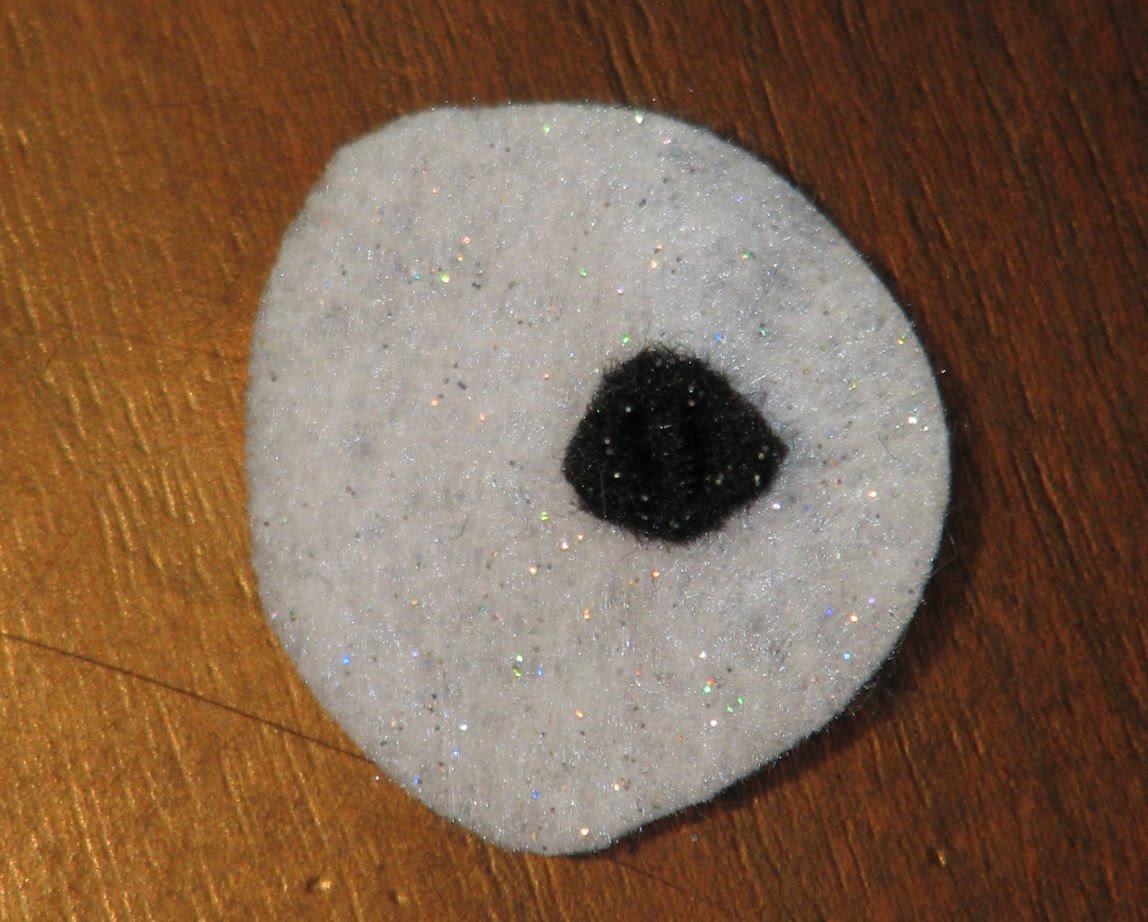
Cut all the shapes you need for your eyes. Because my monster has seven eyes, I needed seven round-ish shapes of white felt for the eyeballs, plus 7 tiny scraps of black felt for the pupils.

Attach the pupils to the eyeballs. Because I was working with such small scraps, I attached the pupils using a small satin stitch down the middle of each piece of black felt. (A satin stitch is a narrow zigzag stitch with a super short stitch length.) The stitching is barely visible in the photo above, but I know it's secure.


This is the underside of the eyeball. You can see the satin stitch better in this photo.


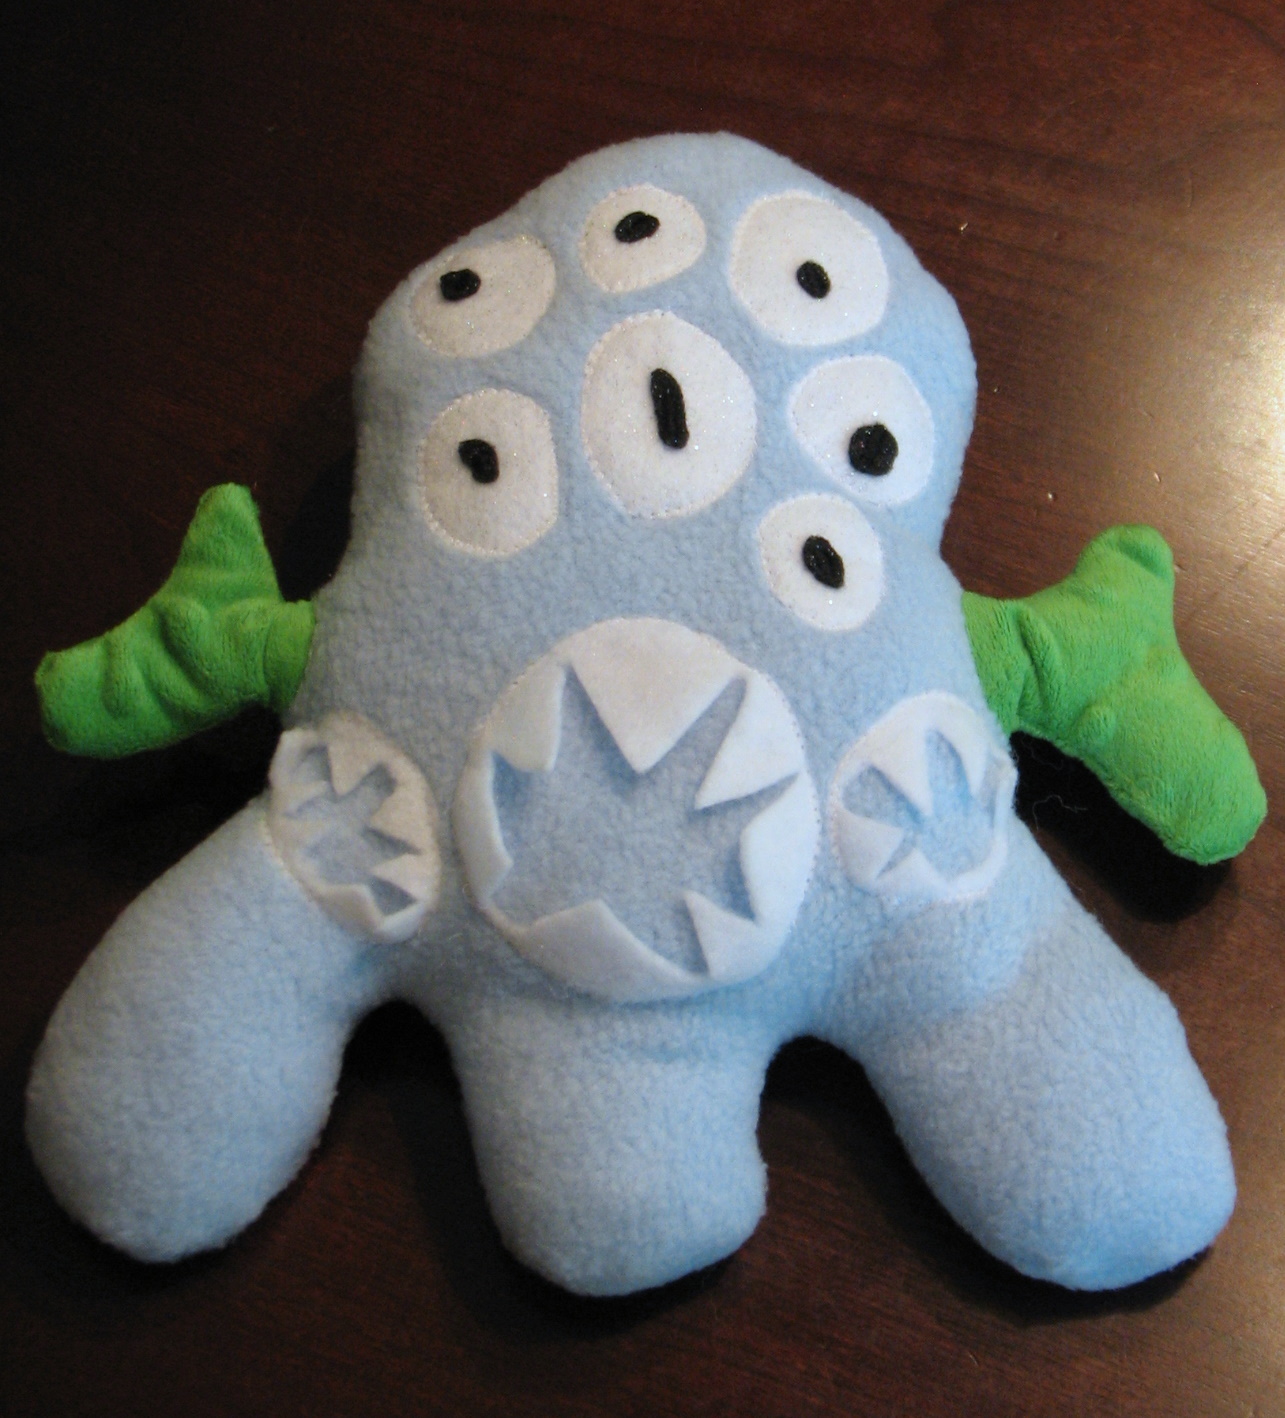
Sew finished eyeballs onto the front of your softie. Here I used a narrow zigzag stitch to applique the eyeballs. If you have a many-eyed monster like mine, I suggest sewing your center eyeball first, then adding the other eyeballs around it.


Cut remaining features (such as mouths) and applique to the front of your softie.

Again, I used a narrow zigzag stitch to attach the mouths. Note: I cut the teeth before attaching the mouths to the body. Wouldn't want to accidentally cut through that blue fabric, would I?

7. Embellish the back of your softie, if necessary.

My softie didn't need any decorations on its back, but if yours needs spikes, tails, spots, or any other features, now is the time to add them.

8. Sew softie together, leaving a hole for turning.

Pin the front and back halves of your softie with right sides together.


Find a straight edge, and leave a 3" hole for turning. The only straight part of my monster was just below its arm. Here you see I've double pinned to remind me where to stop and start sewing.


Sew the front and back halves of your monster together.


Remember, when you get to any arms, legs, or other appendages, sew around the outer edge.


Clip curves, if necessary. Fleece doesn't fray, so I didn't need to finish the edges.

9. Turn and stuff.

Tip: Use a chop stick to poke stuffing through narrow openings, such as arms and legs.


You're almost done!


Stitch opening closed.


Ta-da!


How's it look? The good thing is - if it looks like a six-year-old made it, you did it perfectly! How often can you say that about one of your craft projects? :)


Enjoy these pics of my little monster enjoying his new little monster.