My mom has amazing crochet skills, I tell ya. Thank you, Mom! Thank you, thank you, thank you!
My most favorite part of the outfit - the shoes. The colors, the styling, the flower and leaves...I love it all.
Here's my mom with Charlotte Rose, all fancied up in her new poncho, cloche, and slippers. Funny - when my mom told me she made a cloche, I had to look it up. "Cloche" sounds so much more fashionable than "beanie," don't you think? My mom has since sent a larger cloche for Charlotte, since this first one was was a bit snug.
Let's have one more look at those shoes. My mom used this pattern from The Lovely Crow. Did I tell you how much I love the shoes? Love them. Mom, will you please make me a grown up pair of these for Christmas?
Wednesday, September 21, 2011
Wednesday, August 17, 2011
Warmest Birthday Wishes
*This is my second post for today. To see the pennant banner tutorial, please scroll down.*

This has to be one of my favorite cards I have ever made. I love all things felt and those fuzzy mittens turned out really cute, didn't they? I made sure to save the pattern I drew so I can make more of these cheery little mittens later on. The red felt is glittered - hence the little speckles in the photo.

I made the card for my stepmom's birthday a couple of years ago. When I saw the latest Moxie Fab World Challenge: Fabulous Felt, I knew I wanted to repost it.

Another one of my favorite cards with felt is this happy little tree. (Anyone else remember watching Bob Ross?)

The tree was a ready-made creation by Basic Grey, but I still think it's adorable, especially all dressed up with these papers and ribbon.
Supplies - Warmest Birthday Wishes Card (felt mittens)
Paper: Stampin' Up! (Bashful Blue), Bazzil Basics (white).
Ribbon: Papertrey Ink (Pure Poppy).
Button: Papertrey Ink (Spring Rain).
Other: Stampin' Up! (linen thread), red and light blue felt, white embroidery floss, computer fonts (Honey Script, Times New Roman).
Supplies - Sending Birthday Wishes Card (felt tree)
Paper: Stampin' Up! (Bravo Burgundy, Chocolate Chip, Autumn Vine DSP, Naturals Ivory), Basic Grey (Indian Summer - Acorn.
Stamps: Papertrey Ink (Everyday Button Bits).
Ink: Stampin' Up! (Chocolate Chip).
Ribbon: Stampin' Up! (Chocolate Chip), rick rack.
Felt Tree: Basic Grey (Indian Summer Woolies).
This has to be one of my favorite cards I have ever made. I love all things felt and those fuzzy mittens turned out really cute, didn't they? I made sure to save the pattern I drew so I can make more of these cheery little mittens later on. The red felt is glittered - hence the little speckles in the photo.
Another one of my favorite cards with felt is this happy little tree. (Anyone else remember watching Bob Ross?)
The tree was a ready-made creation by Basic Grey, but I still think it's adorable, especially all dressed up with these papers and ribbon.
Supplies - Warmest Birthday Wishes Card (felt mittens)
Paper: Stampin' Up! (Bashful Blue), Bazzil Basics (white).
Ribbon: Papertrey Ink (Pure Poppy).
Button: Papertrey Ink (Spring Rain).
Other: Stampin' Up! (linen thread), red and light blue felt, white embroidery floss, computer fonts (Honey Script, Times New Roman).
Supplies - Sending Birthday Wishes Card (felt tree)
Paper: Stampin' Up! (Bravo Burgundy, Chocolate Chip, Autumn Vine DSP, Naturals Ivory), Basic Grey (Indian Summer - Acorn.
Stamps: Papertrey Ink (Everyday Button Bits).
Ink: Stampin' Up! (Chocolate Chip).
Ribbon: Stampin' Up! (Chocolate Chip), rick rack.
Felt Tree: Basic Grey (Indian Summer Woolies).
TUTORIAL: Pennant Banner
I finally squeezed in enough time to post the tutorial for the pennant banner / bunting I used for last month's ice cream party. This is a great project for a beginning sewer, it's inexpensive, and it adds a ton of pop!
Supplies
The striped fabric on the left is a dishcloth I found at Target. Since it's a big rectangle, I cut it the same way as the other quilting fabric. (I bought additional dishclothes and used them as a table runner.)
Iron your fabric. Fold your fabric in half wrong sides together so that the selvage edges are touching. Square the top and bottom edges and cut off the selvage. Cut your fabric 9" tall (1/4 yard).
Cut your pennants as shown above. Each pennant is 9" tall (the height of your fabric) x 7" wide. If it helps you to mark your fabric, start at one edge and mark along the top every 7". Starting from the same edge, mark the bottom at 3 1/2", then continue marking every 7". Use a straight edge and rotary cutter to make straight cuts.
Remember, you should be cutting through two layers of fabric. As you cut your pennants, keep each pair of pennants stacked neatly on top of one another other so they're ready to be sewn together.
2. Sew each pennant.
Take your pennant triagles - each with a front and back piece of fabric, right sides facing out - and sew them together along the two long edges. You'll sew the top together when you add the bias tape. Sew close to the edge, about 1/4" - 3/8". The exact measurement isn't important. I moved my needle to its far right position and lined up the edge of the fabric with the edge of my presser foot.
TIP: Start at the top (where a long edge meets the short edge) and sew down to the bottom point. When you get to the point, leave the needle in your fabric, then turn your fabric to sew along the other long edge. This will give a nice, sharp point to your pennant.
You do NOT need to backstitch (staystitch) at the ends. You'll catch these threads when you add the bias tape.
3. Sew the pennants together with bias tape.
Lay out your pennants in whatever arrangement you like.
I spaced my pennants 1" apart. Feel free to adjust the spacing however you wish. If you don't have a lot of fabric but need to fill a lot of space, spread your pennants farther apart. Conversely, you could sew the pennants with the top edges touching so there'd be no space between them.
Pin each pennant inside the fold of the bias tape. TIP: Leave a tail of bias tape on each end for hanging up the banner. I left a 12" tail of bias tape.
Sew the bias tape onto the pennants. Be sure to catch both the front and back layers of bias tape when you sew!
Your banner is done. Admire it and smile! If you need a way to hang your banner on a table, like I did, keep reading.
4. Prep dowels for hanging your pennant banner.
Cut your dowels to desired height, if necessary.
Use spray paint to paint the dowels. I painted mine a sunny yellow to coordinate with my fabric.
Fill flower pots (or the container of your choice) with pea gravel. Insert the dowels and hang your banner.
Enjoy your party!
Supplies
- Fabric. I used 1/4 yard cuts of 5-6 different patterns.
- Extra wide double fold bias tape. 2-3 packs.
- If you don't have a way to hang your banner, 2 wooden dowels, spray paint, and vases/pots filled with pea gravel or something else heavy.
- Standard sewing supplies: thread, rotary cutter, straight edge, sewing machine.
1. Cut your fabric.
For this banner, I used six patterns of fabric. When buying fabric, you'll need 1/4 yard each. TIP: Make sure you buy enough fabric to have 1/4 yard after it's squared. If the fabric is cut crooked, you might want to buy 3/8 yard. You do NOT need to prewash the fabric. The striped fabric on the left is a dishcloth I found at Target. Since it's a big rectangle, I cut it the same way as the other quilting fabric. (I bought additional dishclothes and used them as a table runner.)
Iron your fabric. Fold your fabric in half wrong sides together so that the selvage edges are touching. Square the top and bottom edges and cut off the selvage. Cut your fabric 9" tall (1/4 yard).
Cut your pennants as shown above. Each pennant is 9" tall (the height of your fabric) x 7" wide. If it helps you to mark your fabric, start at one edge and mark along the top every 7". Starting from the same edge, mark the bottom at 3 1/2", then continue marking every 7". Use a straight edge and rotary cutter to make straight cuts.
Remember, you should be cutting through two layers of fabric. As you cut your pennants, keep each pair of pennants stacked neatly on top of one another other so they're ready to be sewn together.
2. Sew each pennant.
Take your pennant triagles - each with a front and back piece of fabric, right sides facing out - and sew them together along the two long edges. You'll sew the top together when you add the bias tape. Sew close to the edge, about 1/4" - 3/8". The exact measurement isn't important. I moved my needle to its far right position and lined up the edge of the fabric with the edge of my presser foot.
TIP: Start at the top (where a long edge meets the short edge) and sew down to the bottom point. When you get to the point, leave the needle in your fabric, then turn your fabric to sew along the other long edge. This will give a nice, sharp point to your pennant.
You do NOT need to backstitch (staystitch) at the ends. You'll catch these threads when you add the bias tape.
3. Sew the pennants together with bias tape.
Lay out your pennants in whatever arrangement you like.
I spaced my pennants 1" apart. Feel free to adjust the spacing however you wish. If you don't have a lot of fabric but need to fill a lot of space, spread your pennants farther apart. Conversely, you could sew the pennants with the top edges touching so there'd be no space between them.
Pin each pennant inside the fold of the bias tape. TIP: Leave a tail of bias tape on each end for hanging up the banner. I left a 12" tail of bias tape.
Sew the bias tape onto the pennants. Be sure to catch both the front and back layers of bias tape when you sew!
Your banner is done. Admire it and smile! If you need a way to hang your banner on a table, like I did, keep reading.
4. Prep dowels for hanging your pennant banner.
Cut your dowels to desired height, if necessary.
Use spray paint to paint the dowels. I painted mine a sunny yellow to coordinate with my fabric.
Fill flower pots (or the container of your choice) with pea gravel. Insert the dowels and hang your banner.
Enjoy your party!
Friday, July 22, 2011
Ice Cream Party
We hosted an ice cream party over the weekend. Friends of ours are moving to Israel. This was a farewell for their family.
I'm working on a tutorial for the pennant banner / bunting that I used for the table decoration. In the meantime, I thought you'd get a kick out of the kiddos.
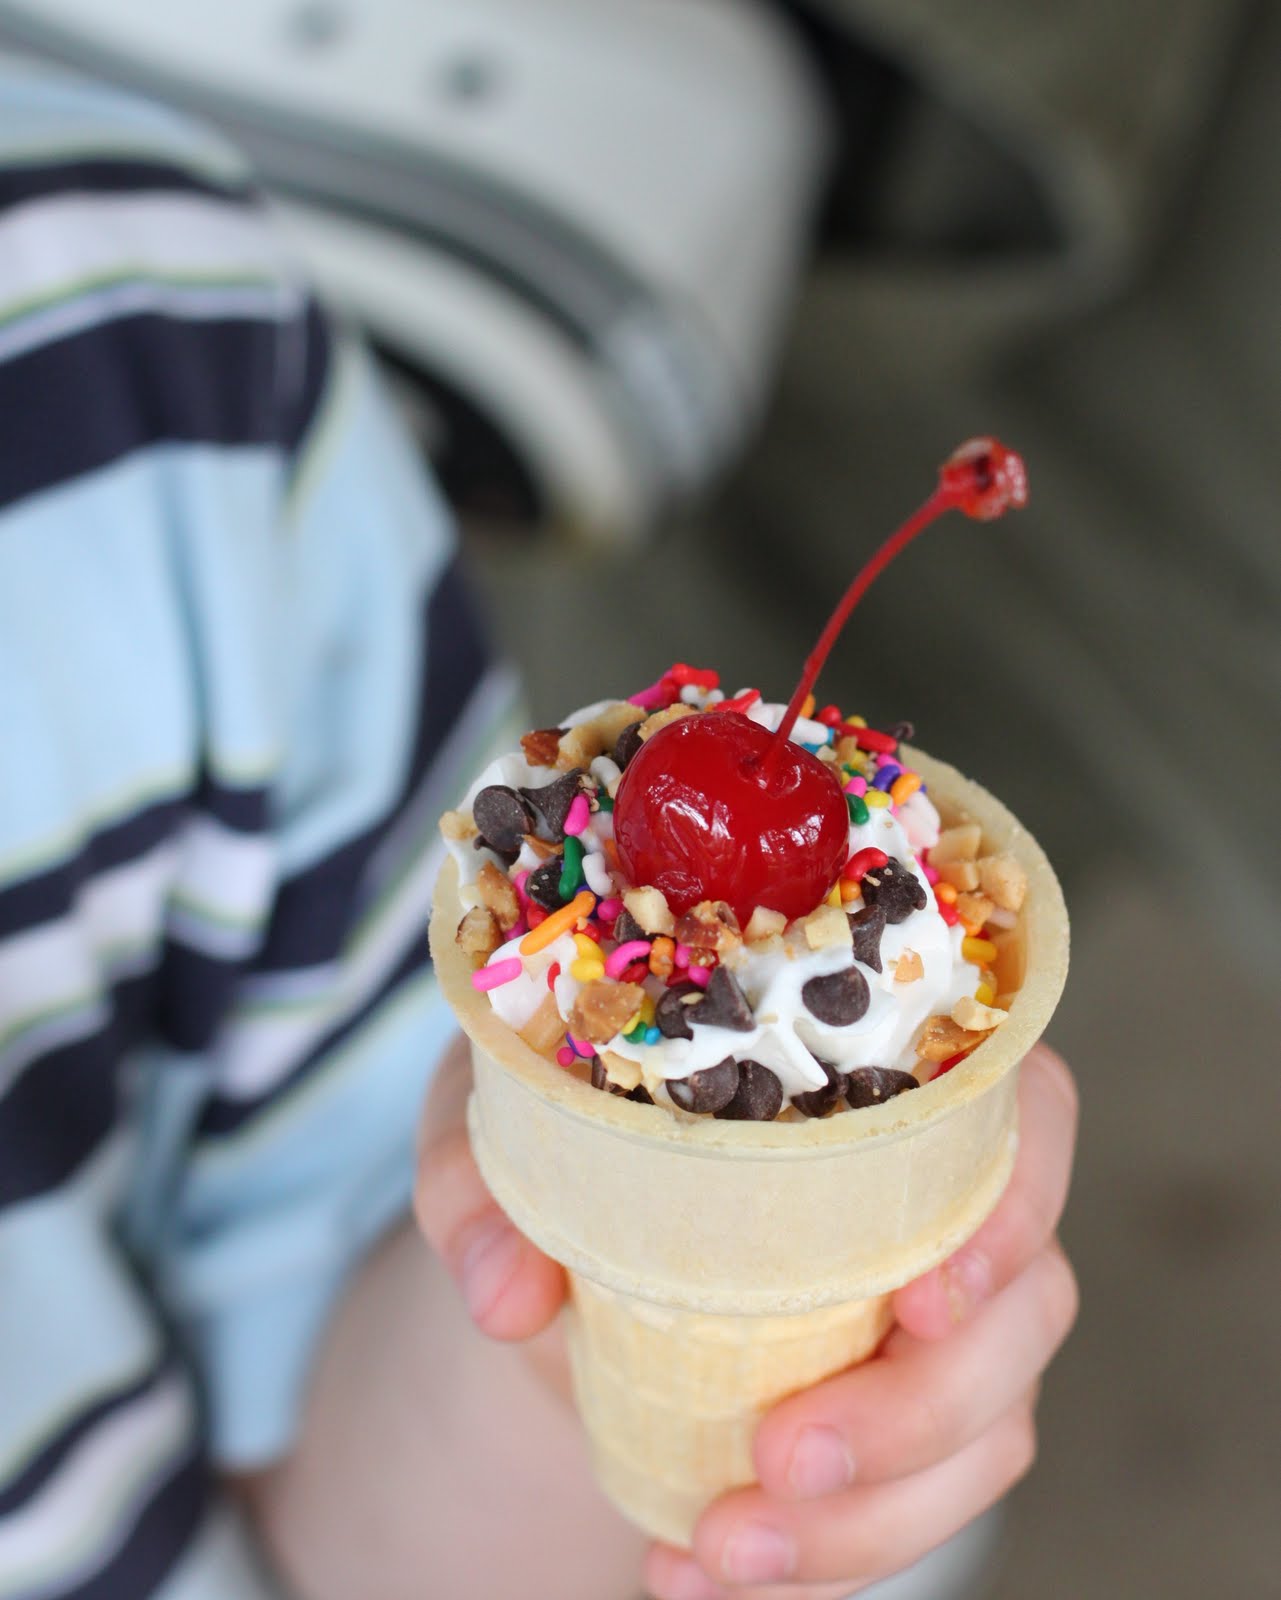
This is my favorite photo from the festivities - a TOPPING CONE. There's not a bit of ice cream in it. It's whipped cream, chocolate chips, peanuts, and rainbow sprinkles, topped with - what else? - a cherry.
The kids kept reaching into the topping bowls to grab pinches of sugary goodness. I finally gave two girls their own napkins loaded up with toppings so these sweethearts could pinch sugar and lick their fingers to their hearts' content without contaminating the rest of us.
Lest you think my children behaved any differently, this was Lincoln's bowl. I think there's ice cream in there somewhere...maybe.
Here's the aftermath of the topping bar, complete with a grown adult reaching in to steal a cherry. I guess we're still kids at heart.
I'm working on a tutorial for the pennant banner / bunting that I used for the table decoration. In the meantime, I thought you'd get a kick out of the kiddos.
This is my favorite photo from the festivities - a TOPPING CONE. There's not a bit of ice cream in it. It's whipped cream, chocolate chips, peanuts, and rainbow sprinkles, topped with - what else? - a cherry.
The kids kept reaching into the topping bowls to grab pinches of sugary goodness. I finally gave two girls their own napkins loaded up with toppings so these sweethearts could pinch sugar and lick their fingers to their hearts' content without contaminating the rest of us.
Lest you think my children behaved any differently, this was Lincoln's bowl. I think there's ice cream in there somewhere...maybe.
Here's the aftermath of the topping bar, complete with a grown adult reaching in to steal a cherry. I guess we're still kids at heart.
Wednesday, July 20, 2011
Made for Charlotte: Afghans
This is another beauty from my mom. I think she all but slept with her crochet hook attached to her before Charlotte was born. Things haven't changed, either. My mom's been making oodles of baby booties and hair bows - originally for Charlotte - but now that word's gotten out, people are requesting baby shoes galore. But I digress...
My mom crocheted this afghan to match the lavender of Charlotte's nursery. Also, see the detail in the butterfly pattern? Love it.
This was the afghan Charlotte wore in my favorite photo of her as a newborn. My sweet baby. My mom also made the head band.
This white afghan was knit by my husband's aunt. It's so soft it makes me want to snuggle up in it - if only I fit.
This is a dressy afghan, if that even makes sense. Maybe because it's white? White is such a timelessly classy color. Plus white + baby doesn't work for everyday use. This is the afghan we wrap Charlotte in at church. And yes, I was a nervous wreck bringing it outside for fear the wind would blow it into the grass and leave it with a permanent green stain. Fortunately the photo shoot was uneventful...
except for this little guy walking in front of the camera. This is Chester, the wonder pug. He was our first "baby" and still gets pampered more than most dogs should.
My mom crocheted this afghan to match the lavender of Charlotte's nursery. Also, see the detail in the butterfly pattern? Love it.
This was the afghan Charlotte wore in my favorite photo of her as a newborn. My sweet baby. My mom also made the head band.
This white afghan was knit by my husband's aunt. It's so soft it makes me want to snuggle up in it - if only I fit.
This is a dressy afghan, if that even makes sense. Maybe because it's white? White is such a timelessly classy color. Plus white + baby doesn't work for everyday use. This is the afghan we wrap Charlotte in at church. And yes, I was a nervous wreck bringing it outside for fear the wind would blow it into the grass and leave it with a permanent green stain. Fortunately the photo shoot was uneventful...
except for this little guy walking in front of the camera. This is Chester, the wonder pug. He was our first "baby" and still gets pampered more than most dogs should.
Labels:
baby,
Chester,
crochet,
knitting,
Made for Charlotte
Tuesday, July 19, 2011
Made for Charlotte: Knit Cardigan + Booties
Wow. Just WOW. Isn't this one of the most beautiful cardigans you've ever seen? It's feather light and oh-so soft - the perfect gift for a Heaven-fresh newborn.
When I tell myself I want to learn to knit, making something like this isn't even on the radar. Ever. Look at the detail. Look how perfectly even each row is. I'm blown away.
A sweet grandma at my church made this for Charlotte. I think I'll see if this grandma will let me adopt her. You can adopt neighborly grandparents, right?
The back of the cardigan is just as beautiful as the front. I can't wait until Charlotte grows enough to fit into this.
The same sweet grandmother also knit a pair of baby booties for Charlotte.
Also, not to detract from the cardigan, but can you tell I'm starting to learn how to use my new camera? I've been reading about photography (a little) and playing with various settings. I like how blurred and buttery the backgrounds are in these photos. It really draws attention where I want it - on the cardigan.
When I tell myself I want to learn to knit, making something like this isn't even on the radar. Ever. Look at the detail. Look how perfectly even each row is. I'm blown away.
A sweet grandma at my church made this for Charlotte. I think I'll see if this grandma will let me adopt her. You can adopt neighborly grandparents, right?
The back of the cardigan is just as beautiful as the front. I can't wait until Charlotte grows enough to fit into this.
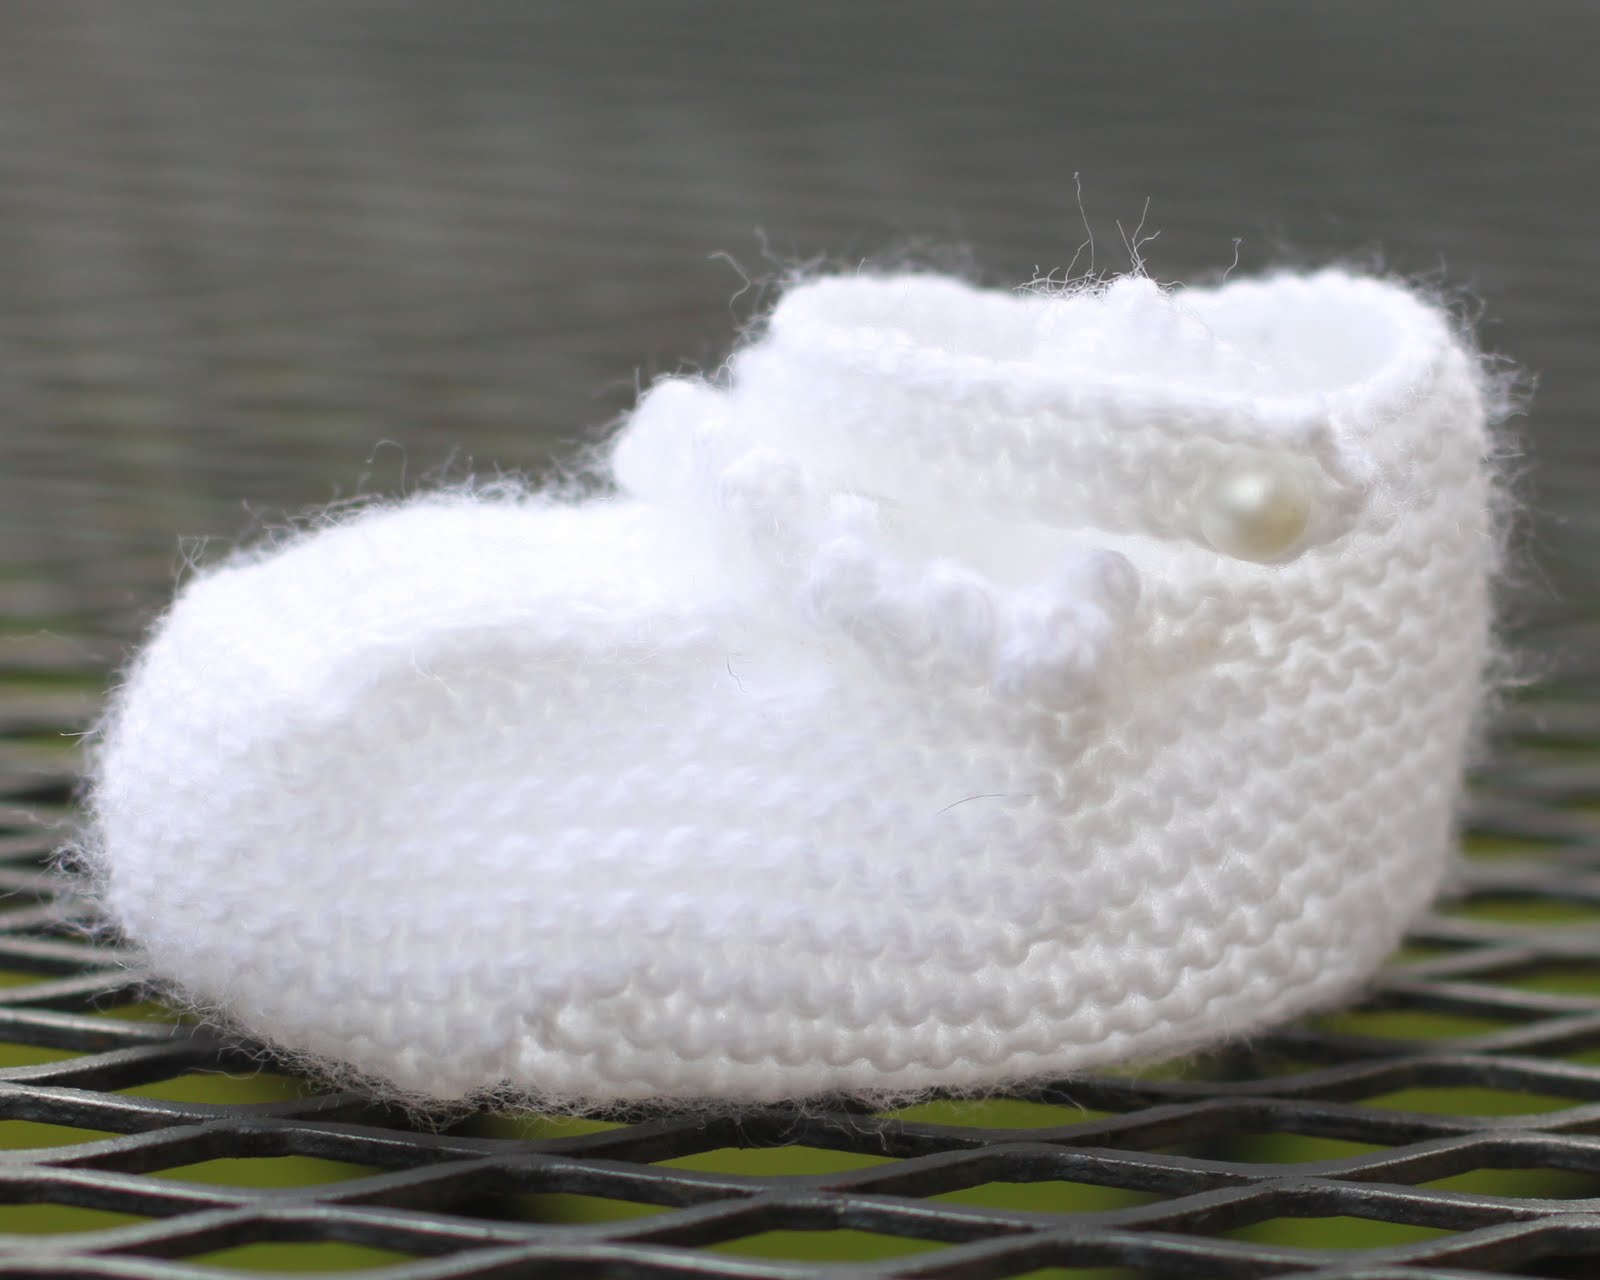
The same sweet grandmother also knit a pair of baby booties for Charlotte.
If you look at the ankle, you can see the ruffle trim just under the strap (Mary Janes!) and sweet pearl buttons.
Also, not to detract from the cardigan, but can you tell I'm starting to learn how to use my new camera? I've been reading about photography (a little) and playing with various settings. I like how blurred and buttery the backgrounds are in these photos. It really draws attention where I want it - on the cardigan.
Friday, July 8, 2011
Made for Charlotte: Burp Cloths
I finally found the secret to perfect burp cloths. More correctly, the secret landed in my hands thanks to my friend Lisa, who whipped up these little gems.
With my previous babies, I packed my diaper bag with two burp cloths. One was the standard, white type that I used for nursing or when no one was looking. The second burp cloth was the cute one I only brought out in public. It was attractive, but not very absorbent. These new burp cloths from my friend are fantastic: fashionable and functional.
Do you see the secret? Chenille! This is one of those times when I want to slap my forehead because the solution is so obvious, yet I never thought of it. Chenille is absorbent and snugly soft so my baby can rest her head on my shoulder for hours.
Backing the chenille in the attractive fabric of your choice is easy peasy. (Layer right sides together --> stitch --> turn --> topstitch --> add additional quilting stitches for stability if desired.) Lisa backed all three of these burp cloths in feminine fabric designed by Amy Butler.
I have to give another nod to my friend Pam for these lovelies. Pam made her burp cloths long and skinny, perfect for tossing over the shoulder. Like Lisa, she used quilting fabric on one side. But Pam backed the burp cloths with waffle weave toweling, similar to what you'd use for dish cloths. It's absorbent, but not bulky. And look what Pam added to the bottom of the pink burpy - pom-pom trim! How cute is that! The pom-poms hang on the back of my shoulder now. But I'm sure the day will come when I'll flip them to the front so Charlotte can grab and tug the little balls of fluff.
These were the perfect homemade baby shower gifts - useful, attractive, and stitched with love.
With my previous babies, I packed my diaper bag with two burp cloths. One was the standard, white type that I used for nursing or when no one was looking. The second burp cloth was the cute one I only brought out in public. It was attractive, but not very absorbent. These new burp cloths from my friend are fantastic: fashionable and functional.
Do you see the secret? Chenille! This is one of those times when I want to slap my forehead because the solution is so obvious, yet I never thought of it. Chenille is absorbent and snugly soft so my baby can rest her head on my shoulder for hours.
Backing the chenille in the attractive fabric of your choice is easy peasy. (Layer right sides together --> stitch --> turn --> topstitch --> add additional quilting stitches for stability if desired.) Lisa backed all three of these burp cloths in feminine fabric designed by Amy Butler.
I have to give another nod to my friend Pam for these lovelies. Pam made her burp cloths long and skinny, perfect for tossing over the shoulder. Like Lisa, she used quilting fabric on one side. But Pam backed the burp cloths with waffle weave toweling, similar to what you'd use for dish cloths. It's absorbent, but not bulky. And look what Pam added to the bottom of the pink burpy - pom-pom trim! How cute is that! The pom-poms hang on the back of my shoulder now. But I'm sure the day will come when I'll flip them to the front so Charlotte can grab and tug the little balls of fluff.
These were the perfect homemade baby shower gifts - useful, attractive, and stitched with love.
Subscribe to:
Posts (Atom)