Thursday, February 10, 2011

Waldorf Doll


Yes, you may clap now. This was completely out of my league! But it's done. DONE! And looks pretty darn cute, if I do say so myself.


When I got here, I cheered. Evenly stuffed legs. Feet. A head that doesn't wobble. Miracle after miracle. I could see the end in sight.


When I got here, I cheered some more. A face...hair...I'm finished! Then I took another look...the doll is naked. Oops, still not done.

I searched and searched online for free patterns for doll clothes. 15-inch, Waldorf doll, Bitty Baby. Nothing. NOTHING. Now, I know some talented mommy-blogger has posted something, but darned if I could find it. So I made my own doll clothes - are you ready to be impressed - without a pattern!


(in your best fashion runway voice) This 15-inch Waldorf doll is modeling a Rachel original: knee-length tunic with contrasting short sleeves and matching leggings. Fabric from the Amy Butler Midwest Modern collection.

I don't know that I ended up with enough pictures to make a full tutorial of the outfit, but I'll try to post general instructions.

Monday, February 7, 2011

In the Works (and kicking my boo-tay)


Anyone ever made a Waldorf doll? Ay yi yi. I was supposed to give this to my niece for Christmas. I keep dragging it out, then putting it away because it scares me. Shape a head? Roll wool into a firm, even ball? Even worse, roll TWO wads of wool into firm, EVEN balls. What...babies can't have one chubby leg and one skinny one?

This is NOT a project for beginners. I had help with the head form. The same helpful friend made the wig caps for me (WAY out of my league). You'll see two wigs on the table. My friend wasn't sure which shade of blonde I'd like, so she let me bring home two colors to audition. Now I'm attaching feet to legs, stuffing arms, mustering the courage to attach the head, and debating what type of clothing and hairstyle to give this plush little girl.

If you look at the right side of the photo, you'll see my husband's hammer and work gloves...


He has a laundry list of projects, too. First, prepping the nursery for our baby. We moved my younger son out of his bedroom and into his big brother's room. Making two rooms' worth of stuff fit into one room was challenge enough! Now for the decorating...Here you can see my husband's priming the walls for a fresh coat of paint.


And what will that fresh coat of paint look like? I'm thinking of a pale aqua. Behold the fabric for Baby Girl's nursery set. When I finish the crib set (you caught that this is another project in the works, right?), it will mostly be red and aqua, with splashes of pink and brown. The red, pink, and aqua fabrics are all from the Bliss collection by Moda.


Lastly, when renovating a bedroom and prepping for a baby, it also sounds like a good idea to install hardwood floors and refurnish a dining room and a living room, right? I know, we're nuts. You can see my husband's already removed the molding and floorboards. Our new Brazilian cherry planks are sittin' happy while they adjust to the temperature and humidity. It takes a week for the wood to acclimate to a new building. Since we're redecorating my younger son's room into a nursery, you can also see piles of his old stuff waiting to be sold on Craigslist.

Does anyone else go nuts when their house is torn apart? I want it DONE! Sorry, this turned out more angst-y than I intended. I can take out my frustration by stuffing the firm parts of the doll. Stuff, stuff, smoosh, smoosh, SMASH.

Tuesday, February 1, 2011

Baby Gift Set: Pants and Applique Onesie


With the deadline of a baby shower looming tonight, I spent the afternoon whipping up this snugly outfit for a Heaven fresh little boy. The sun was already starting to set when I finished, but I think the photograph still turned out well enough for you to get the idea.

I downloaded the pattern for the pants at Make-Baby-Stuff.com. For the whale, I searched online for free animal silhouette clipart.


I appliqued the whale using the same technique that I used in my Personalized Bath Towel Tutorial, then added a button eye.

Easy peasy and too cute, if I do say so myself. And I do. :)

Saturday, January 29, 2011

50th Birthday Party


A more appropriate title for this post might be, In Which I Pretend to Be a Party Planner. A good friend of my family celebrated her 50th birthday this weekend. I offered to help with the party, thinking I might make the invitations...maybe bring a plate of food...and ended up at the helm. This was a fun adventure for me. I've never hosted a party for 70. I admit I'm a total novice, but I sure had a good time pretending to know what I was doing.


The birthday girl wanted a medieval/royal/jewel-toned event. A crown with jewels became the decor element of the evening. If you click on the first photo above, you'll see that she penned a creative invitation to fit her theme.


Aside from the theme, the only other major request from the birthday girl was that she have a dessert buffet. One of the walls in the party room was covered in red velvet. I thought the dessert table would be placed in front of that wall - the red velvet making a nice backdrop - but no, the dessert table was set towards the back of the room. So please ignore the stacked chairs and tables in the background. Also, no need to watermark these photos, eh? No one's going to steal them. The lighting was terrible. This is the only somewhat decent picture I have without people in the background (who might not want their pictures posted).


Even with my bad photography, you can see how amazing these chocolate tortes are. The pastry chef who made these was also a guest at the party, so I wanted to give her credit for her talented work. Yes, these bundles of chocolaty goodness tasted as good - if not better - than they looked.


Colorful fruit tartlets.


I'm lovin' the candy-filled apothecary jar trend right now. Aren't they cute?


The birthday girl loves all things chocolate. So we dressed up a few chocolate staples from See's Candies: chocolate lollipops and...


three flavors of chocolate candy bars. I saw more than a few ladies tuck a bar into their purse. I'm with you ladies - a little now, a little later.


The place cards. Yes, I adhered every rhinestone on every crown by hand. For days and days, while my son did his homework, I sat at the table beside him, gluing my little heart out. Between invitations, placecards, and food labels, I used over 700 rhinestones, all glued one at a time...by hand...with tweezers.


The menu tickets. Guests were offered a choice of three entrees. Each person took a tag to indicate his or her preference. I overheated my new Silhouette making these. *sniff, sniff* Fortunately my friend Heather came to my rescue and let me finish cutting on her machine. And for what it's worth - I give the customer service department at Silhouette America a big thumbs up. Response time was speedy and they didn't give me any trouble about returning my machine.


Finally, here I am beside the dessert table. The sweater disguises my prego belly well, but if you look closely, you can see all five months' worth of the sweet little girl growing inside of me.
Monday, January 24, 2011

Cards with Gray


Whew, it's been a long time since I posted cards. In honor of Moxie Fab World's Gray is the New Black Challenge, here are a few oldies that never made it to the blog-o. All feature the color gray, of course. Enjoy your day!


Supplies: You Make Me Wild Card
Stamp: You Make Me Happy.
Paper: (Basic Grey, Basic Black, River Rock) Stampin' Up!, pattern paper by HOTP.
Ink: black StazOn.
Accessories: ribbon, Thickers by American Crafts.

Supplies: Celebrate in Style Card
Sentiment printed with computer.
Paper: (Basic Gray, Going Gray, Very Vanilla) Stampin' Up!, Amy Butler Lotus mat pad.
Accessories: gray ribbon, Kiwi ribbon, Amy Butler Lotus Faded China Purse, rhinestone brads.

Supplies: Fly Fishing Card
Based off a template from kaboose.com: http://crafts.kaboose.com/fish-card.html.
All supplies Stampin' Up!
Notes: The fishing line is a paper clip that I reshaped. If you look closely, you'll see that I stitched it onto the card at the top of the "water line" and at the top fold of the card. I made the water waves by wrapping strips of paper around a pencil.

Homemade Christmas


The Christmas trimmings have been packed away for weeks, but I'm finally making time to post all the sweet, handmade gifts we received this year. Up first, the snowman family my mom crocheted. The middle snowball represents the new baby due to join our family in May. It's wrapped up in a Christmas sock/blanket.


Love the little charm on my scarf. :)


The boys upgraded their snowmen from decorations to playthings.


We had a few weeks of playing Find the Snowman before bedtime every night because I was so afraid that if I went too long without knowing where each snowman was, we'd lose one for good.


My mom also made this game for the boys. It's a two-player game. Each player rolls the dice, then based on what they rolled, puts a star on the board beside the appropriate symbol. The first player to fill up his or her side of the game board wins.


Both boys loved it, especially my three-year-old, who packed the game to take to all his playdates last month. That's my mom on the left side of the picture. Hi Mom!

Next up is this cheery wall hanging quilted by my stepmother. My stepmom actually made this a year ago, but since I didn't post pictures at the time, late is better than never.


Look at the detail in her stitching. Giving the tree trunk and branches texture...


Outlining the berries...and also adding sparkly paint to make the snowflakes extra shimmery.


My friend Jacquie cross-stitched this sweet little ornament for us. When Jacquie came to visit a few months ago, she taught Brighton how to cross stitch. Bless that woman! Brighton may be a quick study, but she has the patience of a saint.


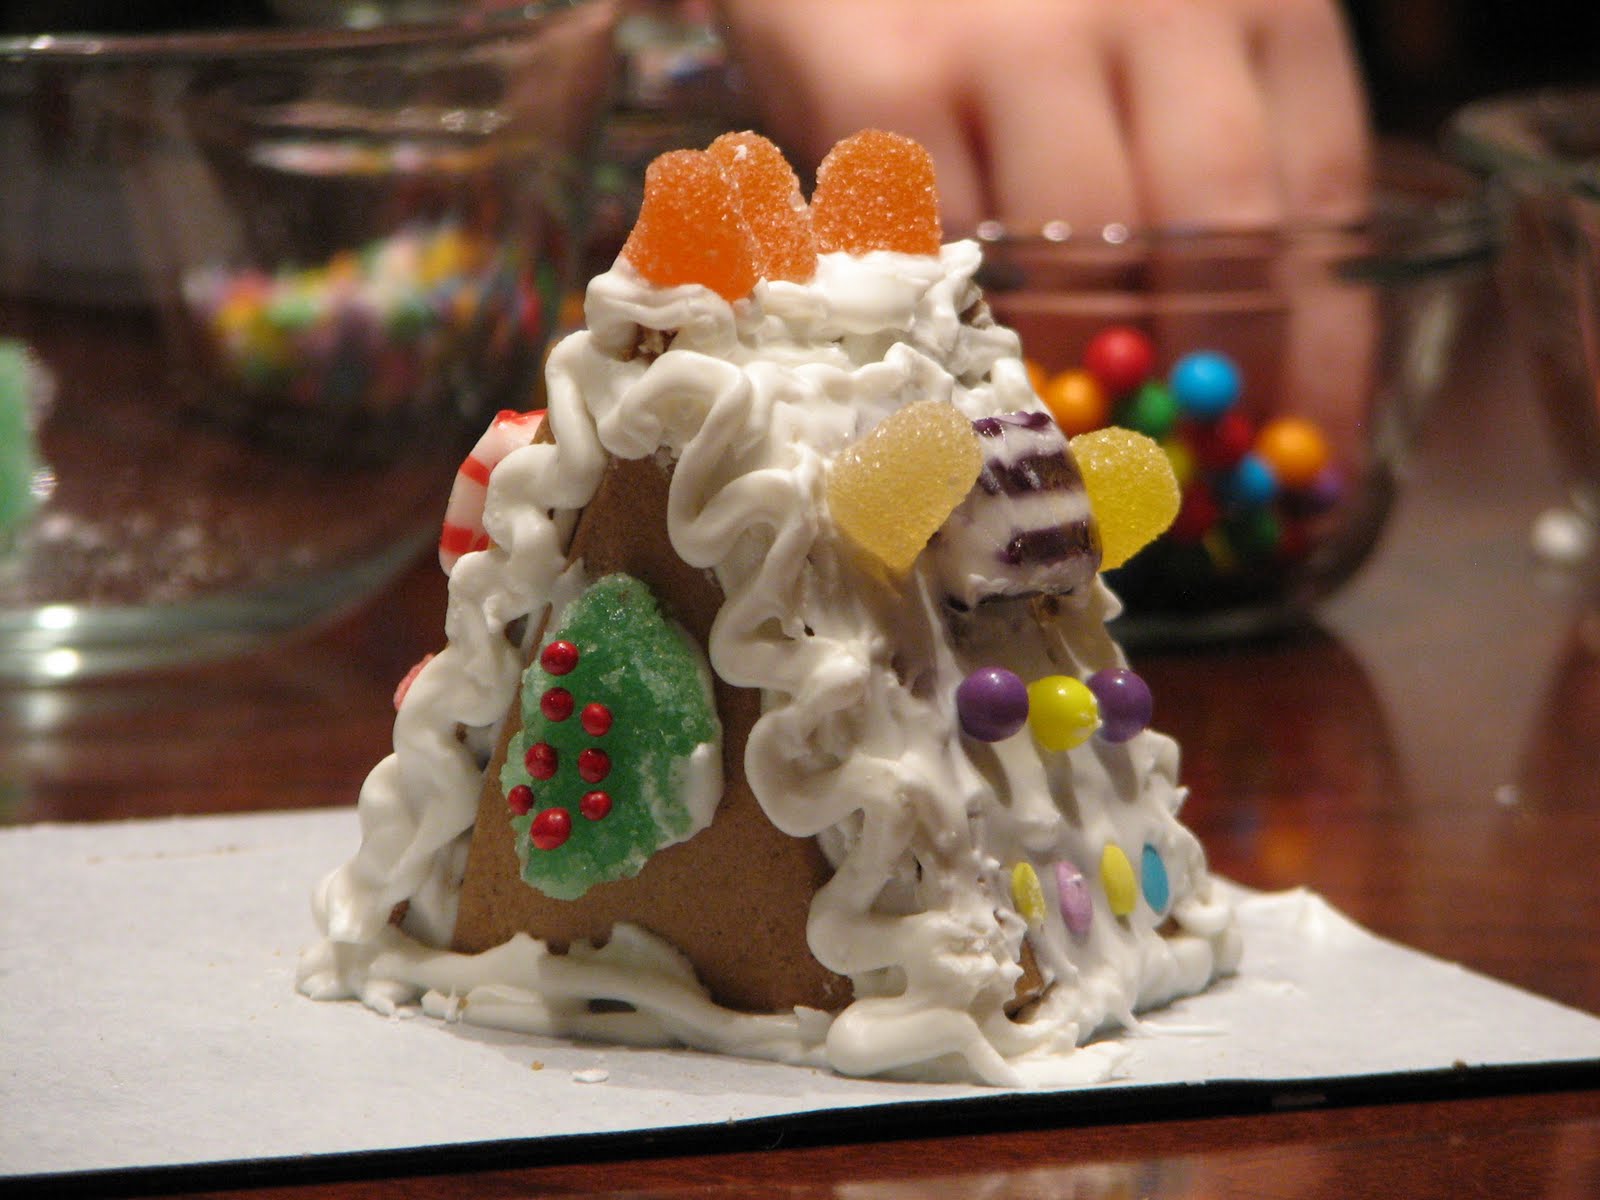
Last but not least, the most quintessential Christmas craft of them all: the gingerbread house.


The boys got good and sugared up decorating these little beauties. My mom bought the supplies when she came to visit and took this as her project with the boys. I was glad for the help. And for the opportunity to snitch all the spearmint gummies while no one was looking.

Saturday, December 11, 2010

Neighbor Gift: Spiced Apple Cider


I hate baking. "Hate" is a strong word, I know. But it's true. Last year I got out of baking neighbor gifts by making these. This year I brainstormed all sorts of ideas from bath fizzies to felt ornaments to homemade granola (I don't count that as baking), when my husband suggested we give jars of spiced apricot-apple cider. (Click HERE for the recipe.) Mmmm...I love the way my house smells when I make a batch of cider. Deal!

I found these cute 1 liter bottles at my local Kitchen Kaboodle. I bought out the store's entire inventory - all three. So most of my gifts looked more like this...

quart canning jars.


Top the jar with some patterned paper, add a ribbon and tag, and voila! Still cute.


I designed the tags to pair together and lay well, but they still swing free of each other easily enough to see that the bottom tag has its own note and refrigeration instructions.


The assembly line.


My little helper. :) Since we make gifts for our neighbors and my boys' teachers (school, piano, church), I really like involving my boys in the gift-making process. Plus any time I start a project, my boys want to jump in - like it or not. So it works out well.

Because I poured the cider into the jars while it was hot, the lids sealed tight. After the jars cooled, Brighton added circles of decorative paper to the top and reattached the rings.


Lincoln helped make the cider by pouring ingredients and stirring. But since he's three and needs constant supervision in the kitchen, I didn't dare step away to snap photos.


Keep the box the jars come in so you'll have a way to pack them in your car for delivery day. Here's one case ready to spread Christmas cheer.

Hope you and your family are enjoying the holidays!

Supplies for the tags.
Punches: (apple punch) Martha Stewart, (tag corner punch) Stampin' Up!, Coluzzle circle cutter, (1/8" round hole punch) Fiskars.
Paper: (kraft) Stampin' Up!. I think the red is Bazzill, but it's really close to Stampin' Up!'s Riding Hood Red.
Ribbon: (Riding Hood Red wide striped ribbon, linen thread) Stampin' Up!, tan ribbon bought by the yard at JoAnn.
Font: Honey Script.